Usage of invite codes specific to your ticket types
Invite codes allow you to make your event more exclusive. Invite codes can be limited by time and number of registrants, allowing the administrator to set up discounts that automatically expire when one of these conditions is met.
To create an invite code, first you'll need to create a ticket if you haven't already, as each invite code is tied to a specific ticket. Go to Registration > Tickets and click into the ticket, then scroll down to the bottom. Click into the tab on the far right titled "Manage invite codes", then click the blue Create invite code button.
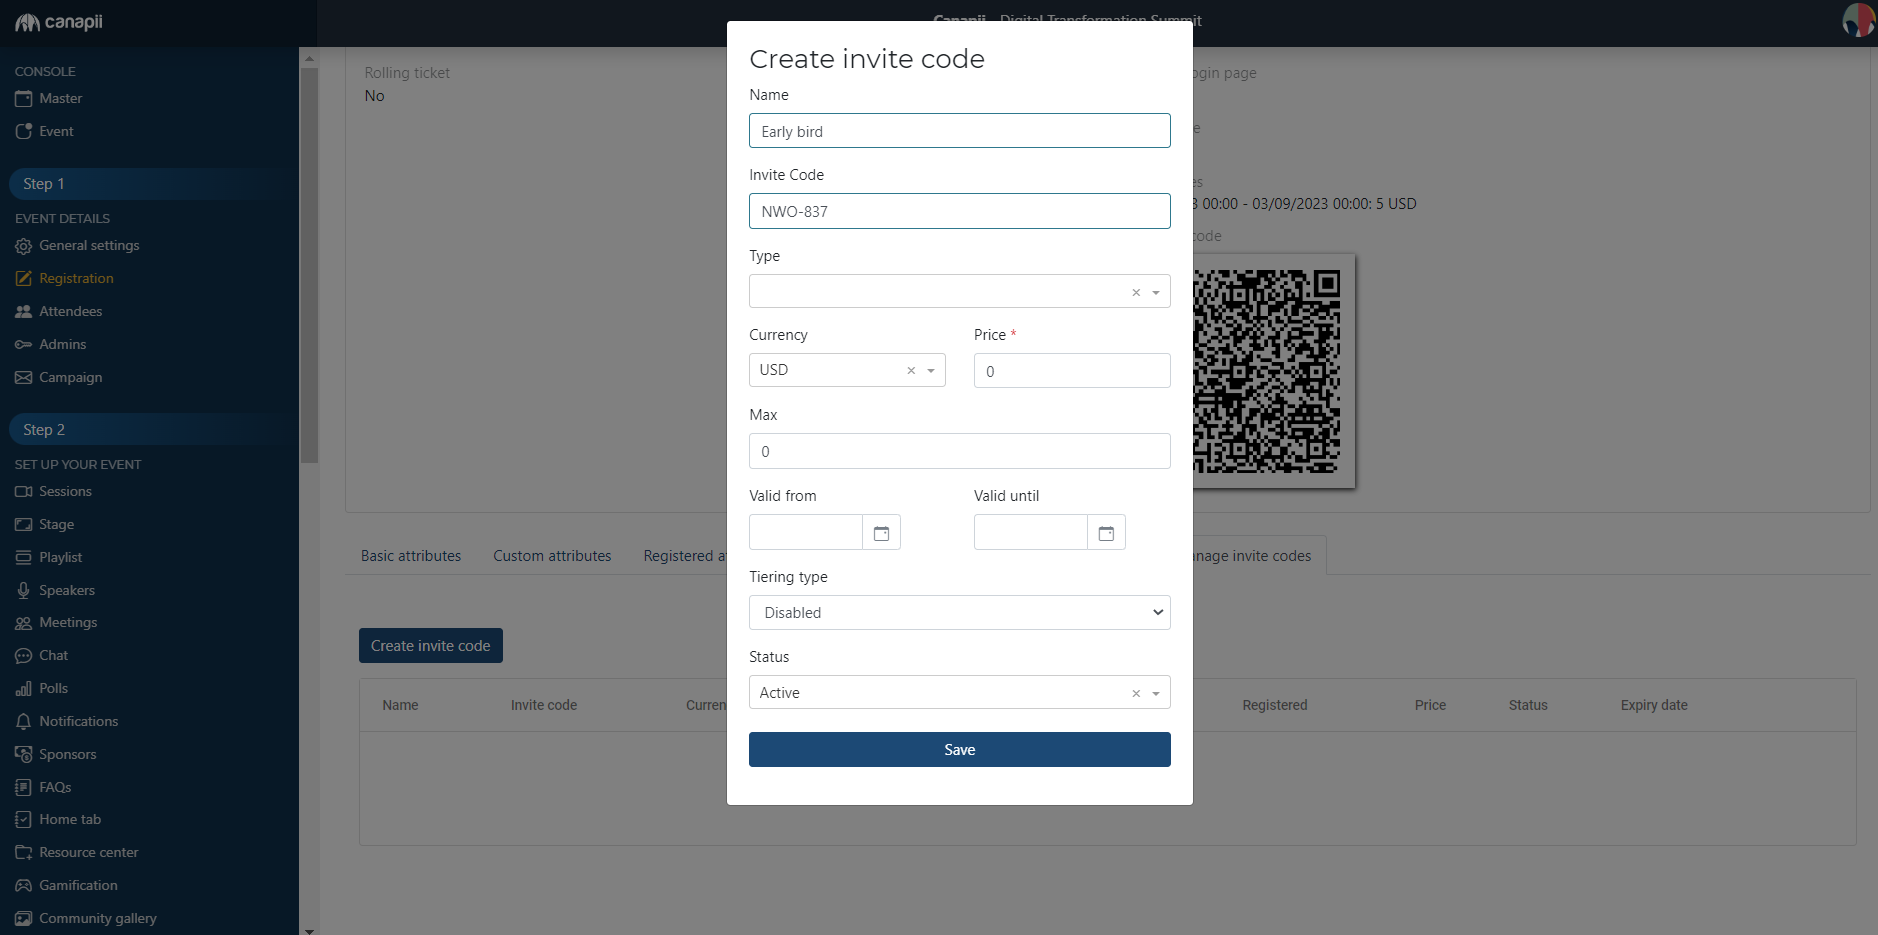
You should see this modal pop up. Choose a name for the code, then input the code into the field below. This is what you'll send to your attendees to use.

You can use the Type field to choose an attendee type (this will limit the invite code so that it can only be used by that attendee type). This is optional.
When the attendee uses the invite code, it will automatically change the ticket price. Use the Price field in the modal to set the invite code price.
You can use the Max field to set a maximum number of invite code registrants. After that, you can use the date To-From fields to set a time window. Both of these fields are optional.
The tiering type allows you to set different prices based on date, tickets sold, or attendee type numbers. This is disabled by default. The status is set to Active by default as well.
When you're all set, click Save. Now you can send your invite code out to your registrants!
Editing Invite Codes for Attendees
Admins also has the ability to change or edit the invite code for a specific attendee after they have successfully registered. To do that, go to Attendee and select the Attendee Name. Click Update and under Invite code, there is a drop down to change the invite code.

