Encourage networking amongst your attendees by ensuring that they know the meeting options available to them!
Attendees' area
Once you have found the attendee that you wish to meet with, you may select the request meeting icon. This will take you to a page where you can define your meeting details, add multiple recipients and select a date and time for the meeting to take place. The recipients will receive an email notification that you have requested a meeting.
Note: The attendee list will only show attendees who have opted in for networking.
Additionally, providing that the event organizer has enabled this feature - You'll also see a call icon. Upon selecting this, the recipient will receive an email notification advising that you want to meet them now and they'll be provided with a direct link to the platform. If the said attendee has disabled their meeting function, they will appear as unavailable.
An attendee can appear as unavailable if they have disabled their meeting function or if they have set their quiet hours. An attendee will show as busy when they have a sessions booked during that time.
Searching for other attendees
The Attendees area also enables users to filter through and search for specific attendees if they wish to do so; however, it would be the responsibility of the organizer to define the rules this. Via the console, the organizer would complete the following actions:
Registration (step 1) > Attributes
Firstly, work through your list of attributes & select 'update'. Here you'll have the option to either enable or disable use as a filter for attendees. Upon enabling, the attribute will pull through on the front end and allow attendees to filter & connect with other participants who fall under the searched for attribute. Attributes include: Country, company, attendee type & job title.
Meetings page
On the meetings page you will see the create button. This will give you the option to define your meeting details, add multiple recipients, and select a date and time for the meeting to take place. The recipients will receive an email notification advising that you have requested a meeting.
Once you have created the meeting, you will be able to view the attendee profile of the recipient by clicking on their name on the meeting side bar.

To request a call from the meetings page, the meeting host simply toggles on the call button. Upon selecting this the date/time option will disappear and the organizer follows the steps to complete the meeting set up. Once the meeting request has been sent, the recipients will receive an email notification that you have requested a meeting.
As the meeting host you will also have the option to update or cancel the meeting and create a chat will all meeting participants.
Tip: If you wish to record the meeting, toggle the record option on in the meeting details and please ensure that the meeting is hosted using Canapii.
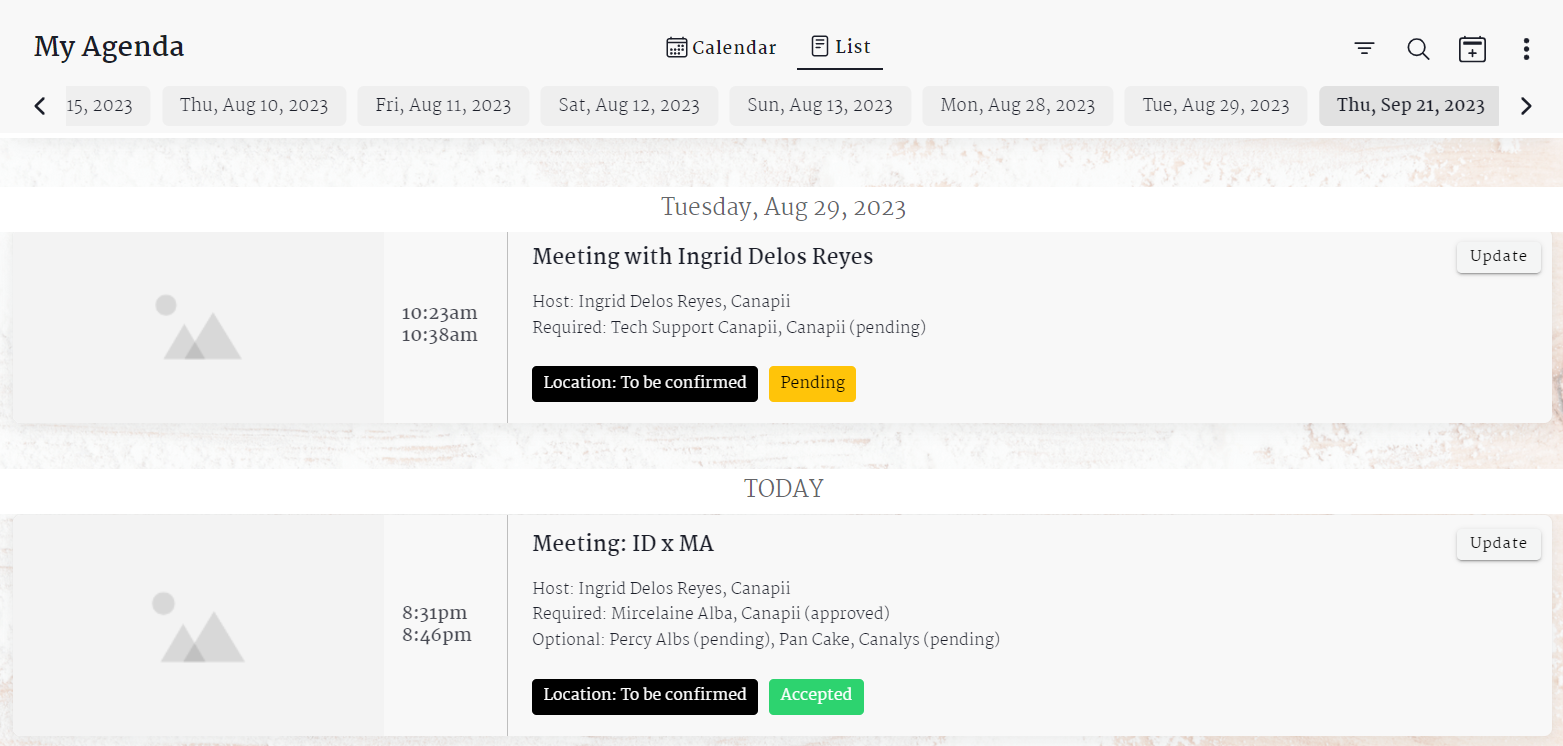
As a user, you are able to easily view the status of your meetings on the meeting list, whether it's Accepted, Pending, Declined or Cancelled. It is important to note that if an attendee chooses to decline a meeting, there will be an email notification to the meeting organizer indicating the reason for declining the meeting. Once a required attendee approves of the meeting invite the meeting status will be changed to Accepted even when the optional attendees still have not accepted or when the invite status is still pending on their end.

Note: You can easily see the details of the meeting on the meeting tile which includes the Host, the required participants, and the optional participants.
