Take control of your check-in kiosk settings
The kiosk functionality is a control panel for on-site attendees and administrators.
The kiosk and control panel are slightly simplified versions of the Console and event dashboard, streamlined for use on site. The kiosk can be pulled up on a tablet or touchscreen and used to quickly register for the event.
On-site Control Panel
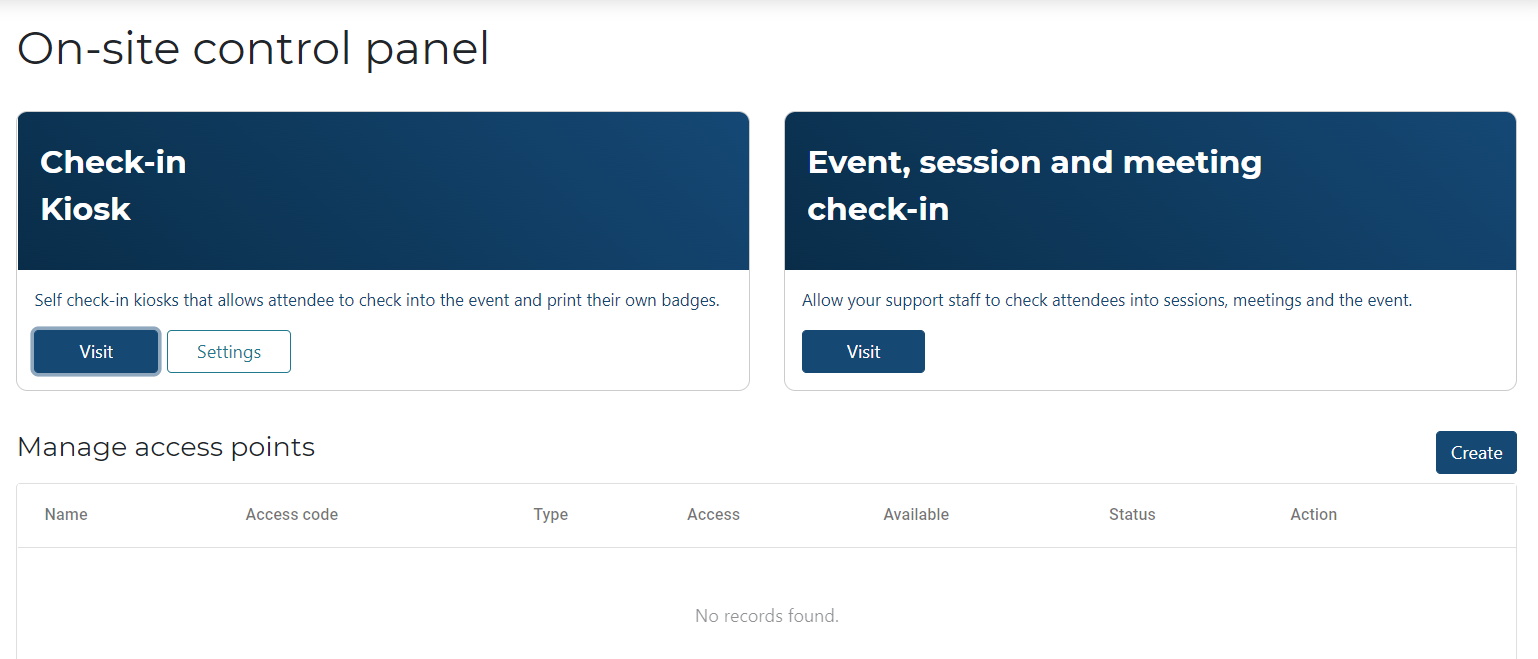
To create your kiosk display, click into the On-site control panel tab under Step 2. If you’re not seeing that tab available, you may need to double-check that your event is not listed as virtual.
There will be two sections on this page: Manage access points, and Check-in kiosk. The access point section allows you to create the different locations for your kiosk. When you've created an access point, a code is automatically generated; when logging into your kiosk, you'll use this code to match the location to your access point. For example, if you have a registration desk, you can create an access point with that name. You'll then use the generated access code to log into the Canapii control panel at the registration desk tablet, which will display the check-in screen.
Click Settings in the Check-in kiosk section to manage your kiosk layout. You can choose a background solid color or image and change the text color; you can also adjust the labels and time clock for the check-in and welcome screens (or disable them entirely). Finally, you can choose whether attendees check-in with their email or with QR, and whether the badge is printed automatically or manually once check-in is completed.

The "Visit" button - click on this button to sign into the kiosk (you'll do this when you set up your tablet, desktop, or other device on-site).
Manage Access Points
On the same tab, you are able to create and manage access points of your event. Click Create and fill in the necessary details such as Name, Type (check-in or control panel), set Status.

When you create your access point (for example, your registration desk), it will automatically generate an access code. When you click the Visit button, it will open a verification page, where you'll input that access code. This functions as your login credential for the access point and sign your device into the kiosk that you created.
Tip: On-site console access points to be updated even when in use. This will remove the need to create new codes if setup incorrectly and allow users to update access as required without having to reenter new code.
Event, session and meeting check-in
First, create an access point in the "Manage access points" section; as the type, select Console and then check off which check-in you're using at that location.
Next, in your other device, click Visit in the session and meeting check-in section and use the access code to log in.
Admins will be able to use that access point to check attendees into sessions, public meetings, or the main event, depending on the settings that you chose.
Tip: Organizers are able to un-check in an attendee if they have been mistakenly checked in. Attendees will then be able to check in again and re-print their badges.
There is also a Print button beside each entry in the attendee list of the control panel, which your admins can use to print the attendee's badge.

The Search button allows you to search for attendees and its activity across the Event check-in tab, Sessions tab, and Meetings tab.
Push notifications in on-site console
Event organizers have the ability to send a push notifications directly to a user through the on-site console.
From the On-site control panel in your console > click Visit (Event, meeting, session check-in > input access code, it will then lead you to your Onsite console. You will see the tabs Sessions, Meetings, and Push notifications.
Under the Meetings tab, select the scheduled meeting then you will see the Send message button where you can send the notification to the attendees of the meeting.
Under the Push notifications tab, you will see all the notifications the organizer has sent.

