From primary and secondary color selections, page banners and custom background images, Canapii offers a fully customizable platform solution to exceed client expectations and wow users.
The majority of branding options are located within your event console’s general settings tab listed under step 1 of your event’s left side event Console menu. Scroll below and click to jump to a specific branding option.
#
#
#
#
Light vs dark mode #
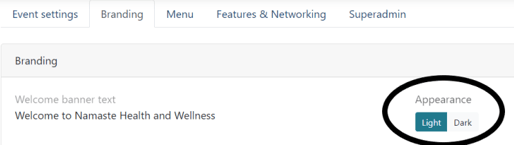
The first question you may want to ask yourself is whether or not your event should have a “light” or “dark” theme. This selection will change the appearance of your event’s login page, registration pages, and general platform.
This option can be found by navigating to your General Settings tab beneath step 1 of your event Console sidebar. Next, click on the Branding tab and toggle the Appearance between Light or Dark.
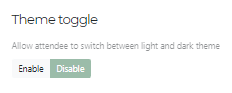
Theme Toggle:
Organizers will also find a theme toggle within this area. Upon selecting ‘enable’ it will allow attendees to switch between light & dark mode. If you enable this setting, we suggest that you think about the branding & color scheme because it must be compatible for a light & dark background.
Primary, secondary and navigation bar colors #
While still on your event’s general settings page, you can scroll down to the branding panel.
Here is where you can select primary and secondary colors by inputting the HEX color code into these fields.
Primary colors are reflecting in your platform’s:
- registration buttons
- app navigation
- chat icons
- and links
Secondary colors are reflecting in your platform’s:
- left-side registration box
- and secondary buttons
Navigation bar
Further, you have the option to select the color of the top navigation bar to compliment the other branding colors you have added to your platform. Simply enter the HEX color code of your desired color into the navigation bar field.
Ensure that the background & text color contrast. If for example, you were to set a dark tone for both, you run the risk of attendees being unable to see which each of the functions are within the navigation bar!
Custom fonts #
You can customize your event font by clicking the desired font family of your choice. You can check your chosen font by typing on the bar below the font dropdown.
We have more than 1500 fonts available. You can view the full font list here.
General platform banners #
Below the area where you denoted primary and secondary colors above This is where you upload a company or organization logo and event branding for login banners, email banners, and event banners. The page gives helpful prompts on where the branding is used for your reference. Please pay special attention to any dimensions for an optimized look and feel.
Once you change these images to your own branding, the standard images Canapii has added will disappear.
Logo
Optimized measurements: 110 x 30 pixels
This logo will appear in the top left-hand corner of the platform, in the menu bar. Once uploaded, you can check out how this looks by jumping to pressing View draft event (step 3).
Platform banner
Optimized measurements: 1920 x 500 pixels
This is used on your registration pages and is the default banner on the homepage. Ideally, the image should be dark, abstract, and not contain any text.
Remember, once you add a session and set it as a highlight banner the default homepage banner will be replaced. Once uploaded, you can check out how this looks under registration in step 1 of your console side bar.
You can also show or hide the platform banner with the enable or disable toggle.
Email banner
Optimized measurements: 750 x 120 pixels
This is used on all email notifications about your event from Canapii. Once uploaded, you can check out how this looks under Registration (step 1).
Login banner
Optimized measurements: 1280 x 800 pixels
Sometimes attendees will access your event from the login page, rather than the registration page.
Meeting logo
Optimized measurements: 200×100 up to 400×100 pixels
This will apply your logo to the right hand side of the screen for meetings hosted on Canapii.
the maximum file size of each image used is 3MB.
#
Background image #
Scrolling all the way to the bottom of the branding panel will give you a spot to upload a background image for your event. This image will be used as the background of all pages (excluding login, forgot password, and registration pages). We suggest dimensions for this image to be between 1920×1080 and 2560×1440 pixels in size. We also suggest that the image not be too busy as to distract attendees from the engaging content your event has to offer.
#
Additional page banners and descriptions #
Some pages have optional headline banners and page descriptions that you can use to create a cohesive look and feel across your entire event platform.
Below are a list of the pages where you can upload banners and include page descriptions by selecting the  button:
-
- Speakers
- Polls
- FAQs
- Resource center
- Gamification
- Community gallery
- Community forum
- Projects
- Meetings (select
 then
then  to include a blurb at the top of the event meetings page)
When including a banner image what dimensions should the banner be? #
We find that a banner size no larger than 1920×300 pixels looks great! However you can always play around with different sized banners to find the one that best fits your page’s needs.
Session tile graphics #
Session banner: 1920 x 1080
Playlist preview: 1620 x 1080 (This is the area of the session graphic that will be shown when the session is added to a playlist – note the reduced width. We suggest keeping any text or images that are baked into this graphic within these dimensions)
Highlight banner: up to 1920 x 500
Secondary banner: up to 1920 x 175
VOD thumbnail: 1920 x 1080 (This is shown within VOD sessions before the user presses the play icon to watch the session. This option is uploaded beneath the assets tab at the bottom of the specific session’s settings page)
Note: playlist preview, highlight banner and secondary banner images are pulled default from the session’s banner. Sizes provided are guidelines of the maximum visible area (from the center of the image) and will be dependent on user’s screen size.
Tip: When a session is highlighted in either the main or secondary highlight position, you have the option to override the image used as the highlight banner. To utilize this simply highlight the session from the session’s settings page and a new option window will appear to the right with additional controls for the session’s highlighted appearance.
Speaker and attendee profile images #
Profile images: 400 x 400
Picture files supported: JPEG & PNG.
Console offers a cropping tool to adjust final image size.
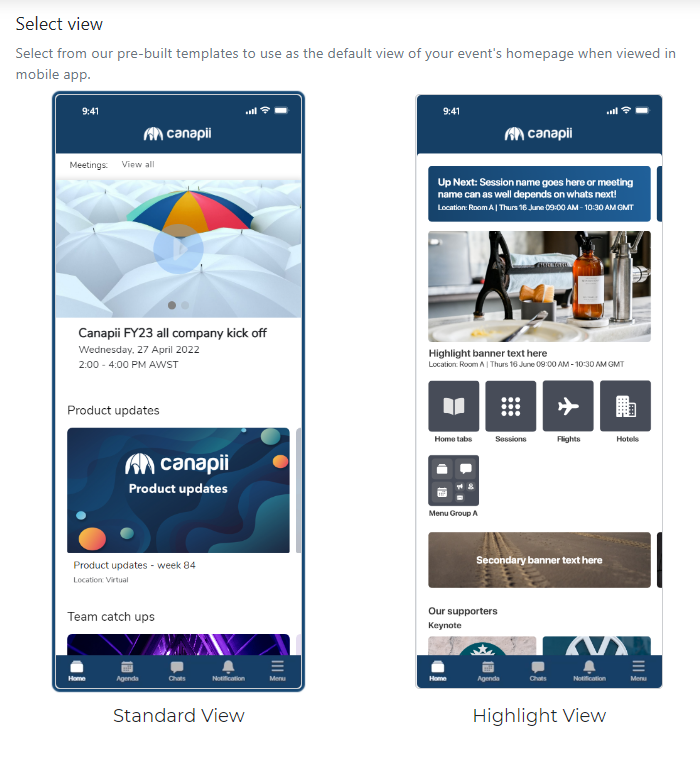
Mobile App Homepage View #
You are able to select between Standard View and Highlight View
Favicon #
Event organizers can also make use of uploading their own branding via Favicon.
Tip: Dimensions should not be larger than 96×96 or smaller than 16×16.
Countdown Timer #
If you’d like to add a countdown to attendees’ native mobile app, go to General Settings > Branding and then scroll down to the Countdown section. Choose a date and time (you can also change the time zone in this section if you’d like – otherwise, it will default to your event’s time zone), and an optional background. Click Save to commit the changes.
To overlay a countdown over the banner in the Microsite/landing page, go to the Microsite tab, click the Edit button on the Banner section, and then toggle Enabled on. Use the calendar icon to choose your countdown date. Once you’ve finished, click Save data in the upper right corner of the Microsite page.